
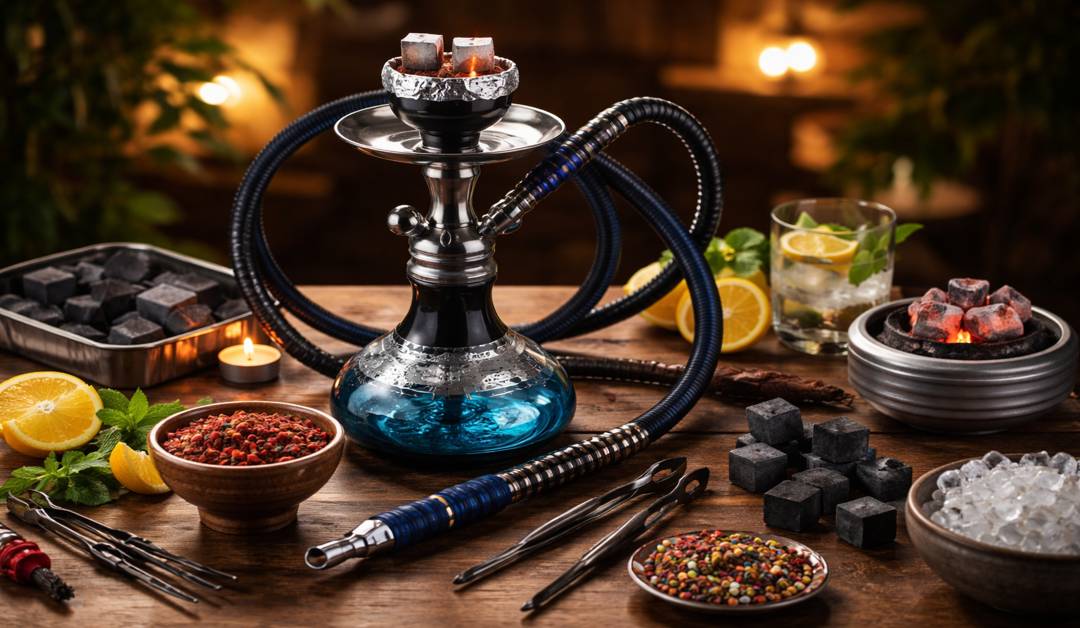
Your first hookah session should not be a guessing game. But for most beginners, it is. The box arrives, the parts look unfamiliar, and every guide online either skips steps or spends half the article on hookah history you did not ask for.
This guide skips all of that. By the end, you will know exactly how to setup a hookah from start to finish — how to pack the bowl correctly, how to manage your coals, and what to do when something goes wrong. Keep this open while you set up.
If you are completely new and still figuring out what hookah even is, start with our beginner guide on what is hookah and how it works before coming back here.
What You Need Before You Start
Get everything on this list before you touch a single part. Mid-setup scrambling leads to rushed mistakes.
- Hookah pipe — base, stem, tray, and hose (usually comes as a set). If you still need one, browse our full hookah collection to find one that fits your space and budget
- Hookah bowl (chillum) — the cup that holds your shisha tobacco. We stock clay, silicone, and ceramic chillums — each one affects flavor and heat differently
- Shisha tobacco — the flavored tobacco that goes in the bowl
- Aluminum foil or heat management device (HMD) — covers the bowl and controls how much heat reaches the tobacco
- Natural coconut coals — cleaner burn, much better flavor than quick-light coals
- Coal tongs — you will burn your fingers without them
- Coal burner or gas stove — to fully light the coals
- Grommets/gaskets — small rubber rings that seal each connection on your hookah
A quick note on coals: quick-light coals are convenient but they burn harsh and leave a chemical aftertaste, especially in the first few minutes. Start with natural coconut coals. Yes, they take 5–8 minutes to light. It is worth it every time.
Before You Assemble: Prep Your Hookah
Most guides jump straight into assembly. That is exactly why so many first sessions disappoint.
If your hookah is brand new, rinse the base, stem, and hose with warm water before your first use. Factories leave residue inside the parts. You do not want that going into your lungs on session one.
If you have used it before, old tobacco residue and stale water sitting in the base will dull the flavor of your smoke. It can make even a good shisha taste flat or slightly off. A quick warm water rinse before every session takes two minutes and makes a real difference to taste.
Now check your gaskets. These are the small rubber rings that create airtight seals at every connection — between the stem and base, between the bowl and stem, and between the hose and hose port. Press each gasket in firmly. If any connection feels loose or wobbly, your smoke quality suffers immediately. A hookah works like a closed system. One air leak anywhere breaks the pressure and ruins the draw before you even light the coals.
Step-by-Step Hookah Setup
Step 1: Fill the Base with Water
Pour cold water into the glass base until the bottom of the metal stem sits about 1 to 1.5 inches below the waterline. That measurement matters.
Too much water makes the draw feel heavy and hard to pull through. Too little means the smoke does not filter or cool properly and hits harsh. Stay in that 1 to 1.5 inch range and you will be fine.
Want a noticeably smoother, cooler draw? Add a few ice cubes to the water. It is a small change with a big impact on how the smoke feels, especially during longer sessions.
Step 2: Attach the Stem
Push the stem firmly into the base. You should feel the grommet grip and seat snugly. There should be zero wobble once it is in.
Do a quick airtight test before moving on: place your palm flat over the open top of the stem and try to inhale through the hose port. If you feel suction, the seal is good. If air leaks around the stem, press it in tighter or swap the grommet for a new one.
This test takes 10 seconds. Skip it and you might spend 30 minutes later wondering why your smoke is weak and thin.
Step 3: Attach the Tray and Hose
Slide the tray onto the stem. It sits just below where the bowl will go and catches falling ash and stray coal pieces during the session. Connect the hose to the hose port and push it in until it sits snugly with no visible gap. Give it a light tug to confirm it holds.
Step 4: Pack the Bowl
This is where most beginners go wrong. If there is one section to read slowly, it is this one.
Start by fluffing the shisha with your fingers before you put it in the bowl. Shisha often comes tightly packed in its container. You need it loose and airy in the bowl, not compressed into a dense block. Think of it like loosening soil — air has to be able to flow through the tobacco for it to heat evenly.
Drop the shisha into the bowl gently. Fill it to just at or slightly below the rim. Never pack it above the rim, and never press it down with your fingers. You want the tobacco sitting loosely so airflow can move through it freely from top to bottom.
Leave a 2mm gap between the top of the tobacco and the foil you are about to place over it. If the tobacco touches the foil, direct heat from the coals burns it immediately and the smoke turns bitter and harsh. That gap is the difference between a smooth session and a ruined one.
The type of bowl you use also changes your results. Clay bowls are classic and work well for most shisha. Silicone bowls are more durable and easier to clean. Ceramic bowls distribute heat more evenly.
Step 5: Cover the Bowl with Foil
Tear off a piece of aluminum foil and stretch it tightly over the top of the bowl. It should sit flat with no sagging in the center. A foil that sags in the middle drops down onto the tobacco and restricts airflow — exactly what you are trying to avoid.
Use a toothpick or hookah poker to punch small, evenly spaced holes across the surface. Work in a circular pattern covering the full surface. Do not make the holes too large — smaller holes give you better control over how much heat passes through to the tobacco. Do not make too few either or the tobacco will not heat evenly across the bowl.
If you have a heat management device (HMD), use that instead of foil. An HMD sits on top of the bowl and holds the coals in place while giving you better control over heat. It takes the guesswork out of coal placement. Once you have your first few sessions done, it is a worthwhile upgrade.
Step 6: Light the Coals
Place your natural coconut coals directly on a coal burner or gas stove. Light the burner and let the coals sit for 5–8 minutes, turning them once or twice with your tongs as they heat up.
You will know they are ready when they are glowing orange-red on all sides with a light gray ash forming on the surface. That ash layer is the sign they are fully lit and ready to use. Do not rush this step. Coal that is only partially lit gives off a harsh, chemical taste that ruins the entire session.
Pick up the lit coals with your tongs only. Never touch them with your hands, even briefly.
Step 7: Place the Coals and Start the Session
Place the lit coals on the outer edge of the bowl, not in the center. Coals in the center concentrate heat directly onto the middle of the tobacco and burn it fast. Coals on the outer edge heat the bowl slowly and evenly from the sides, which is exactly what you want for a long, smooth session.
Wait 2–3 minutes before you take your first pull. This lets the tobacco preheat gradually. Beginners who start pulling the moment the coals are placed almost always get a harsh first draw. Be patient here.
When you are ready, put the hose to your mouth and inhale slowly and steadily. This is not a cigarette. Do not puff. Pull gently and let the smoke travel to you at its own pace. After a few slow draws, you will see smoke filling the hose and feel it become thicker and smoother. That means the shisha is heating correctly and your setup is working.
Troubleshooting Common Beginner Problems
|
Problem |
Likely Cause |
Fix |
|
Harsh or bitter smoke |
Coals too central or too many coals |
Move coals to the edge, remove one coal |
|
Weak or no smoke |
Air leak somewhere in the setup |
Check all gaskets, redo the airtight test |
|
Tobacco burning too fast |
Overpacked bowl or too much heat |
Re-pack looser, reduce to two coals |
|
Gurgling sound while inhaling |
Too much water in the base |
Pour some water out |
|
No bubbling sound at all |
Not enough water or stem not sealed |
Add water, press the stem in tighter |
|
Smoke tastes stale or flat |
Old shisha or residue in the base |
Use fresh shisha, rinse the base before use |
If smoke stays harsh after moving the coals outward, place a small extra sheet of foil under the coals as a heat buffer. It reduces direct heat without cooling the coals completely.
How to Clean Up After the Session
Do not leave a used hookah sitting overnight. Old water in the base goes stale quickly and affects every session that follows.
After every session:
- Empty the base water immediately while everything is still warm
- Rinse the base, stem, and hose with warm water
- Empty and wipe out the bowl
- Let all parts air dry before reassembling or storing
Every few sessions, run a thin brush through the inside of the stem to clear out any tobacco residue or buildup. A hookah that gets regular quick rinses stays cleaner, tastes better, and lasts significantly longer.
You Will Get Better Fast
The first setup is always the slowest. By your third or fourth session, most of this becomes automatic. The two steps that matter most are packing the bowl and placing your coals. Nail those and everything else follows naturally.
If you still need to pick up your hookah or any accessories before your first session, browse our complete hookah collection at Tobacgo. We stock hookahs across every size and budget, plus all the accessories you need to get started right.